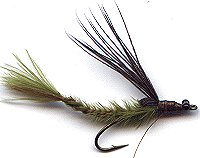
Damsel Fly Nymph
The Fly
The Damsel Fly Nymph can be an important pattern for spring fishing. A couple of times during our traditional trout fishing trip around Whitsun the fish have been very selective and have keyed in on these nymphs. Any larger nymph would do OK, but an exact imitation can’t hurt (and in any case; it’s good for your self-confidence).
As with the dragon flies, the colours of damsel fly nymphs vary a lot. Dark olive or brown shades are the most common, though, which is what my recipe shows.
If you study a damsel fly nymph swimming near the surface, you see that it’s a fairly long and slim creature that you’re going to imitate. I have chosen a Scorpion hook called Living Larva (31270), which unfortunately is no longer in stock here in Sweden. I have not yet found an equal substitute, but I’m sure there are other hooks that would work fine.
The technique of weaving marabou for the tail is not new, but the tying descriptions I’ve seen involve securing lead shot, glueing knots etc, which make the fly unnecessarily cumbersome to tie. Because of this, I have developed a different method that is much simpler and I have also substituted the various dubbing materials for marabou, which – in my opinion – makes the fly look better when wet. By adding CdC to the thorax, the fly can easily be converted into an emerger. It’s no idea weighting the fly since it’s supposed to be fished near the surface when the damsels are hatching.
Tools & Materials
Tools
- Bobbin
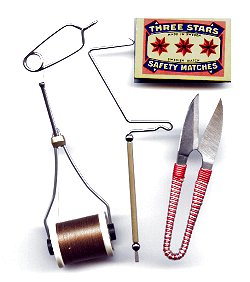
- Whip-finisher
- Hackle plier
- Scissor
- Heat source for melting the Amnesia line for the eyes
- Tweezer (not shown)
- Toothbrush (see image further down)
Materials
- Hook: Living Larva #12 (Scorpion)
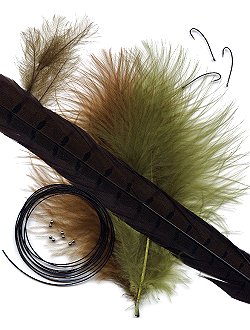
- Thread: Dark olive 6/0
- Tail: Woven olive marabou
- Abdomen: Olive marabou
- Wing sack: Brown pheasant’s tail, dyed
- Thorax: Olive marabou; mixed with CdC for better floating capabilities
- Eyes: Amnesia line or two balls from a ball chain
- Head: Tying thread in front of the eyes
 The upper image on the right shows some olive CdC feathers, Scorpion Living Larva hook, one olive and olive-brown marabou feather with long fibres, Amnesia for the eyes, ball chain eyes and an Orvis pheasant tail feather dyed brown.
The smaller image shows how I have secured my hackle pliers to the vice with a rubber band. This way, the pliers are always at hand. In tying this pattern, the clump of marabou fibres will be held by the pliers while we weave the tail. The pliers should then be pointing towards the tier and not to the side as shown in the picture.
Tying technique
Step 1
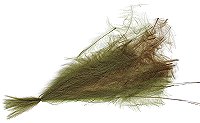 Start by cutting off 30-40 fibres from an olive marabou feather with long fibres. You could also add some olive-brown fibres. Place the clump of marabou, with ends aligned, over the edge of the tying bench. Cut off some tying thread and tie it around the marabou clump, about 15 mm in, with a double half hitch, but be careful not to make the knot too large since this will mar the final result. Align the ends of the tying thread with the marabou fibres and cut them to the same length.
 Now attach the marabou clump in the hackle pliers on the vice. By clamping the pliers over the knot, we avoid the risk of fibers or thread ends that slip as we weave the tail. Fasten the hook to the vice and wind the thread from the eye to a point directly in front of the hook point. Lock the thread temporarily by making two turns forward and then one turn backwards. Divide the fibres into three clumps with one thread end in each. Now start weaving. In the beginning, you’ll lose the grip and will have to start all over again, but you’ll soon get the hang of it. The longer the fibres are, the easier it is to weave them.
Hold the end of the tail securely and remove it from the hackle pliers. Place it on the hook, with the tail extending the same length as the section of the hook that you’ve covered with thread and tie it in with a few good turns of tying thread.
Step 2
 The fibres are often a little uneven in length, but you can nip them off with your fingers so that you get an even end of the tail.
Now take the tying thread forward towards the eye and tie in the rest of the tail. Leave a couple of millimeters for the eyes behind the hook eye and cut off the surplus.
Now melt the Amnesia so that a nice, rather small eye is formed. Cut off the section and hold it with tweezers as you melt the other end to make a second eye. Tie in the eyes half a millimeter behind the hook eye by making three figure-of-eight turns on each side. Secure the eyes with two turns of thread behind and another two turns in front of the Amnesia and take the thread to the tying-in point for the tail.
Step 3
 Tie in 8-10 marabou fibres for the abdomen, about 2 cm from the tips. Twist the fibres 5-10 turns and then clamp them in the hackle pliers. Wind the body about half the length of the hook shank, secure with a few tight turns of thread and trim off the surplus. By stroking the abdomen forwards with your fingers, you get the fibres to rise. Trim on top and bottom, leaving the fibres on the sides to imitate gills. If the fibres are too long, you may need to trim them.
Step 4
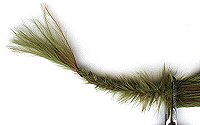
 Now it’s time to tie in the wing sack. If you look at a damsel fly nymph, you can see that it has two separate wing cases that join in a wing shield. This is perfectly possible to imitate, but is time-consuming and takes a lot of effort. If you want to make a couple of nymphs for your private collection you could spend the extra time and make a wing sack that is divided in a left and a right section.
Cut off 15 long fibres from a pheasant’s tail and tie them in by the wider end so that the tips point backwards. Fold the fibres forward to make a wing case that is approximately two millimeters in length and then tie down the fibres. Fold backwards again and tie down securely at the tying-in point. Take your thread forward over the thorax and bind down the fibres. The fly should now look like the one in the picture on the right.
Step 5
 The thorax area is made by cutting off 5-6 marabou fibres and dubbing them onto a waxed thread that is then wound in even turns forward. Leave the thread hanging in front of the eyes, fold the wing sack forward and secure with 3-4 turns of thread (see image). Hold the fibres up and make a small head. Four or five turns of thread plus two
 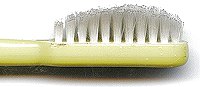 whip finish knots are usually enough. Cut off the fibres even to the eyes. To finish off, brush the thorax area with an old tooth brush to make the fibres rise.
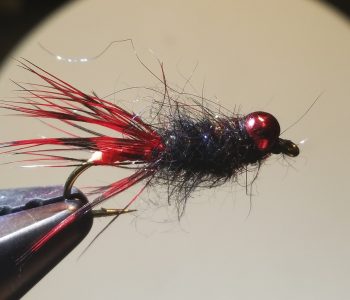
Variants
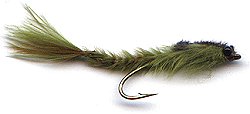
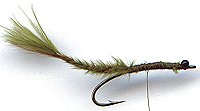
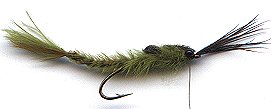
 I tied this variant of the damsel fly nymph on a standard hook. The tail is a little longer and the wing segments are tied in at the rear end of the hook shank. The eyes are from a ball chain and painted with a permanent marker which makes the fly swim deeper than the unweighted pattern above.
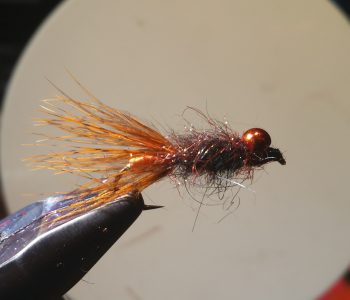
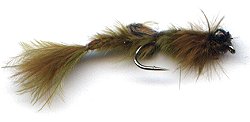
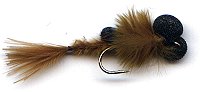 This is a booby variant of the pattern. The thorax is made like the tail in the description above and the eyes are made from black foam placed in a ladies’ stocking. This fly is also olive-brown to serve double duty as a dragonfly nymph. Booby flies fished on an intermediate line can be extremely efficient in lakes where action is slow, especially in spring.